Feeds:
Posts
Comments

Archive for the ‘Food’ Category

Chive Mash

Everyone loves mash in our house especially with lots of cream and butter added. Chives from the garden are also a popular addition.

Chive Mash – serves 6 generously

  • 1kg potatoes, peeled and cut into chunks
  • 8 tbsp double cream
  • 50g butter
  • 6 tbsp snipped chives

Cover the potatoes with cold water and a good pinch of salt and bring to the boil. Cook for 15-20 minutes or until tender, then drain in a colander and return to the warm pan to dry.

Gently heat the cream in a small saucepan, then add the butter and pour over the potatoes. Season with salt and freshly ground white pepper. Add the chives and beat with a wooden spoon until fluffy.


Read Full Post »

Paella de rape con azafran

This is a great weekend dish that is relatively easy to make and looks amazing when brought to the table with all its fabulous colours. The key to a good paella is not to stir it. Shake the pan occasionally to prevent sticking.

Wine Suggestion: We started with a glass of dry Hidalgo Napoleon Amontillado sherry followed by an old, but wonderfully youthful and fresh, Dehesa la Granja 14 1998 a Tempranillo from close to the Portuguese border in Castilla. The 14 refers to the minimum amount of time it is held by Alejandro Fernandez in his underground caverns on this property before release. At 18 years old it was delicious proof of the ageworthiness of this unique estate and its elegance and refined fruit didn’t overwhelm the monkfish.

Monkfish rice with saffron (Paella de rape con azafrán) – serves 4 as a main or 6 as a starter

  • 7 tbsp olive oil
  • 400g monkfish fillets, trimmed and cut into bit-size pieces
  • 2 large Spanish onions, finely chopped
  • 2 green peppers, halved, seeded and finely chopped
  • 6 garlic cloves, finely chopped
  • ½ tsp fennel seeds
  • 800ml hot fish stock (buy it fresh at your fishmongers)
  • 1 tsp saffron threads
  • 250g calasparra (paella) rice
  • 80ml white wine or fino sherry
  • 1 small bunch of flat-leaf parsley, roughly chopped
  • ½ tsp sweet smoked Spanish paprika
  • 225g piquillo peppers, torn into strips (we buy the brand Navarrico)
  • 1 lemon, cut into wedges

Heat 2 tbsp of the olive oil in a 30-40cm paella pan or frying pan over a medium-high heat. Add the monkfish and toss gently to fry until slightly undercooked in the centre. Remove the monkfish and any juices to a bowl and set aside.

Wipe the pan clean with kitchen paper and put back onto the heat. Add the rest of the olives oil and heat until hot, then add the onions and peppers, and cook for 15-20 minutes, stirring occasionally.

Turn the heat to medium, add the garlic and the fennel seeds, and cook for 10 minutes or until coloured and sweet. Meanwhile, bring the stock to the boil in a separate saucepan. Add the saffron, then take off the heat and leave to infuse for 10 minutes.

Add the rice to the paella pan and stir for a minute to coat with the oil and vegetables. (You can prepare the dish up to this point before your guests arrive. The recipe will take about 20 minutes to finish.)

Put the heat to medium-high and add the wine/sherry to the pan, followed by the hot stock. Add half the parsley and the paprika and season generously with salt and pepper. Do not stir the rice after this point. Simmer for 10 minutes or until there is just a little liquid above the rice. Spread the monkfish and its juices out across the top of the rice and gently push each piece of fish into the liquid. Gently shake the pan to prevent sticking and turn the heat to medium-low. Cook for 5 minutes or until there is just a little liquid left at the bottom of the rice. Turn the heat off and cover the dish tightly with foil. Leave to rest for about 5 minutes before serving.

Decorate with strips of piquillo peppers, the rest of the parsley and the lemon. Serve with a salad if you like.

(Original recipe from Moro: The Cookbook by Sam and Sam Clark, Ebury Press, 2001.)

Paella de rape con azafran

Read Full Post »

Flageolet bean pie

A simple, warm, comforting and meat-free weeknight dinner.

Wine Suggestion: this is one where a good Pinot Grigio works, or more specifically a Pinot Gris from Pfalz in Germany or Alsace; dry, round and with good apple & pear fruits. Our choice this time is the Villa Wolf Pinot Gris from the Pfalz which finishes clean and refreshing but didn’t overwhelm the flavours of the dish.

Flageolet Bean Pie – serves 4

  • 1 tbsp olive oil
  • 1 onion, finely chopped
  • 3 garlic cloves, crushed
  • 3 x 400g tins flageolet beans, drained and rinsed
  • 5 tbsp crème fraîche
  • 2 tbsp fresh thyme leaves (or use dried thyme)
  • 100g breadcrumbs
  • 50g cheddar cheese, grated
  • dressed salad leaves, to serve

Heat the oil in a frying pan and gently fry the onion for about 5 minutess until softened. Stir in the garlic and cook for another minute. Add the beans, crème fraîche and half the thyme. Season well, then cook until heated through.

Meanwhile, heat the grill to high.

Mix the breadcrumbs and cheese together, then stir in the rest of the thyme. Pour the beans into a baking dish and scatter with the breadcrumbs. Grill until the topping is crisp and golden. Serve with a green salad.

(Original recipe from BBC Good Food.)

Read Full Post »

Thai salmon cakes with carrot salad

We like to use the Thai curry pastes that come in plastic tubs, Mae Ploy is a good one. There’s always more in the tub than we need which forces us to search for lots of recipes to use it up. This is a bit different for a weeknight, tastes really good and is healthy too.

Wine Suggestion: a light aromatic white is what we’d suggest, like a QbA or Kabinett Riesling from the Mosel. They tend to have a welcome low alcohol (7 to 9 % abv), delicate and vibrant fruit and a refreshing zing to cut through the little bit of residual sugar. A dry Riesling doesn’t work as well; the touch of sweetness helps balance the chilli and curry paste perfectly.

Thai Salmon Steaks with Carrot Salad – serves 2

  • 2 skinless salmon fillets, about 300g in total, cut into large chunks
  • 2 tsp Thai red curry paste
  • small handful of coriander leaves
  • groundnut oil

CARROT SALAD:

  • 1 tbsp rice wine vinegar
  • 1 tsp golden caster sugar
  • a small chunk of ginger, finely grated
  • 2 large carrots, grated
  • 3 scallions, shredded lengthways
  • 1 red chilli, shredded lengthways
  • handful of coriander leaves

Put the salmon, curry paste and coriander in a food processor. Pulse until roughly chopped, then form into 6 fishcakes and chill while you make the salad.

Mix the rice wine vinegar and sugar until the sugar dissolves, then add the ginger. Toss all the other salad ingredients together with the dressing.

Heat the oil in a non-stick frying pan. Cook the salmon cakes for 2-3 minutes per side until golden and cooked through. Serve with the salad.

(Original recipe from BBC Olive Magazine, April 2011.)

Read Full Post »

Chicken patties with rosemary & pancetta

Try these delicious chicken patties by Nigel Slater. Some of our favourite dishes are those where a sticky caramelised crust forms in the pan. Nigel suggests some lemon wedges and a spinach salad to serve.

Wine Suggestion: a 100% Grenache red actually is the business with this dish. While we see Grenache in quite a lot of blends when on it’s own it has a lovely spice, and if not too alcoholic and jammy (it ripens to high levels if untamed) a wonderful lightness of touch with soft, velvety tannins. If you’re exceptionally lucky an old (15-20yo) Chateau Rayas would be a treat. We drank, instead, the delightful l’O du Joncier Cotes du Rhone made by Marine Roussel in Lirac; a biodynamic, wild yeast treat that both treads lightly on the earth and tastes great.

Chicken patties with rosemary & pancetta – serves 2-3

  • 1 medium onion, peeled and finely chopped
  • 2 cloves of garlic, peeled and finely chopped
  • a thick slice of butter
  • 100g cubed pancetta
  • leaves from 3 sprigs of rosemary, finely chopped
  • 450g chicken mince (if you have a mincer buy some chicken thighs and mince your own)
  • groundnut oil for frying
  • 250ml chicken stock

Warm the butter over a medium heat in a large frying pan. Add the onions and cook until softened and golden. Stir in the pancetta and rosemary and cook for a few minutes or until coloured. Empty the contents of the pan into a large bowl and allow to cool a bit.

Add the chicken mince to the onion mixture, season generously with pepper and a little salt, and mix well (your hands are the best tool for this). Shape the mixture into six little burgers and set aside for about 30 minutes to rest.

Preheat the oven to 190ºC/Gas 5.

Wipe the onion pan clean with a piece of kitchen towel and put back on the heat until hot. Add a small amount of oil and brown the patties for about 3 minutes on each side, then transfer to an ovenproof dish. Pour the stock into the dish and bake for 25-30 minutes or until the patties are sizzling and the stock bubbling. Serve with some of the hot stock spooned over.

(Original recipe from The Kitchen Diaries by Nigel Slater, Fourth Estate, 2005.)


Read Full Post »

Tandoori pork burgers

This was such a tasty weeknight dinner inspired by a half-used jar of tandoori curry paste and a packet of supermarket naan breads. Ditch the naans for gluten-free burgers.

Wine Suggestion: A juicy Spanish, or Spanish varietal, should work here. There are some great and good value Garnacha’s, like one made by Bodegas Monfil, which are perfect when on a budget. If you want to push the boat out choose a ripe and juicy Ribera del Duero made from Tempranillo. Our favourite of the moment is the Carmelo Rodero and try their 9 Mesas for the juicy youthful fruit. Older and more concentrated Crianza’s and Reserva’s would overwhelm the dish.

Tandoori pork burgers with tomato & coriander raita – serves 4

  • 500g lean pork mince
  • 1 red onion, grated
  • 2 tbsp tandoori curry paste (we like Patak’s)
  • a small bunch of coriander, chopped
  • 150ml natural yoghurt
  • 2 tomatoes, chopped
  • 4 scallions, sliced
  • naan breads, to serve
  • Little Gem or Cos lettuce, to serve

Put the mince, onion, curry paste and half the coriander in a bowl, season with mix well, then form into 4 burgers.

Barbecue the burgers for 4-5 minutes on each side or until cooked through. Meanwhile, mix the rest of the coriander with the yoghurt, tomatoes & scallions.

Serve the burgers in some warm naan breads (we toasted ours on the barbecue) with the crispy lettuce and raita.

(Original recipe by Janine Ratcliffe in BBC Olive Magazine, August 2009.)

Read Full Post »

Thai pumpkin & chickpea curry

Thai pumpkin & chickpea curry

A really good veggie curry and yet another use for the never-ending tub of Thai red curry paste. We’re very excited for pumpkin season and not because we want to make lanterns.

Pumpkin & chickpea curry – serves 4

  • 1 tbsp sunflower oil
  • 3 tbsp Thai red or yellow curry paste
  • 2 onions, finely chopped
  • 3 stalks lemongrass, bashed with the back of a knife
  • 6 cardamom pods
  • 1 tbsp mustard seeds
  • 1 piece pumpkin or a small squash (about 1kg)
  • 250ml vegetable stock
  • 400ml can reduced-fat coconut milk
  • 400g tin chickpeas, drained and rinsed
  • 2 limes
  • large handful mint leaves
  • steamed rice and/or naan bread, to serve

Heat the oil in a sauté pan and gently fry the curry paste with the onions, lemongrass, cardamom and mustard seeds for a few minutes or until fragrant. Stir the pumpkin or squash into the pan and stir to coat in the paste, then pour in the stock and coconut milk. Bring to a simmer, add the chickpeas, then cook for about 10 mins until the pumpkin is tender.

Squeeze the juice of one lime into the curry, then cut the other lime into wedges to serve on the side. Tear over mint leaves to garnish and serve with steamed rice or warm naan bread.

(Original recipe from BBC Good Food)

Read Full Post »

Pizza baked potato

The vast majority of our weeknight dinners are based on whatever happens to be left in the fridge after the weekend.  It turns out that leftover pizza toppings taste pretty good on top of a baked potato too. Also suitable for those who don’t eat pizza dough.

Wine Suggestion: If you happen to have something open already, that will do nicely.

Pizza Jacket Potatoes – serves 4

  • 4 large baking potatoes
  • 1 tbsp olive oil
  • ½ red onion, finely chopped
  • 1 garlic clove, crushed
  • 60g sliced pepperoni, torn (the thin sliced stuff from a packet will do fine)
  • 400g tin chopped tomatoes
  • small handful of basil leaves, shredded
  • 100g grated mozzarella/cheddar cheese

Heat oven to 200ºC/180ºC fan/gas 6.

Prick the potatoes all over with a fork. Bake directly on the oven shelf for 1-1½ hrs, or until soft.

Meanwhile, heat the oil in a small pan and sauté the onion for 5 mins to soften. Stir in the garlic and pepperoni, and cook for a minute or two,  then add the chopped tomatoes. Bring to the boil, then simmer for 5 mins. Season and stir in half the basil. Spoon over the split potatoes and top each one with a good handful of cheese and the rest of the basil.

(Original recipe from BBC Good Food.)

Read Full Post »

Roast Beef
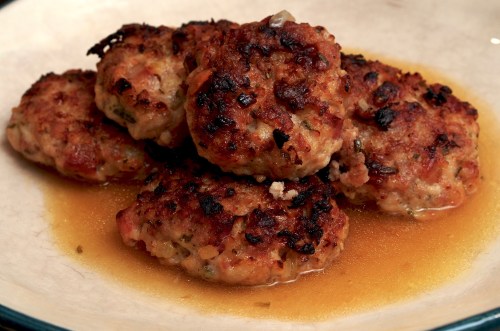
How to make friends and influence people – serve them roast beef! We love it rare.

Wine Suggestion: a classic dish requires a classic match; good red Bordeaux. Specifically we love left-bank Bordeaux from a good vintage which has all the power but is never heavy; we don’t want to overwhelm the beef as it should be the star. 2009 and 2010 are surprisingly drinking very well and show how good they are but we’ve found the 2005’s are only just opening up. Interestingly we prefer more youthful vintages with this dish and think that the joy of primary fruit with just a little development makes a better match. For this meal we dug into the cellar and pulled out a Chateau Chasse-Spleen 2005 which was still quite tight and structured but the load of tannin in the wine worked perfectly with the proteins in the beef.

Rare roast beef with rosemary, bay & shallots – serves 4

  • rolled sirloin joint, about 1.1kg
  • 1 tbsp Dijon mustard
  • 4 sprigs rosemary
  • 3 bay leaves
  • 16 shallots
  • 500g baby new potatoes
  • olive oil

Preheat the oven to 220ºC/Fan 200ºC/Gas 7.

Make a bed with the rosemary and bay leaves in the bottom of a large roasting tin.

Smear the beef with mustard, salt and pepper and set on top of the bed of herbs. Make sure the herbs are well tucked in to prevent them burning.

Put the shallots and potatoes around the beef. Drizzle olive oil over the potatoes and shallots and toss with your hands to coat.

Roast the beef in the oven for 20 minutes, then turn down to 190ºC/Fan 170ºC/Gas 5. Cook for a further 20-25 minutes, then remove from the oven and rest for 10 minutes while keeping the potatoes & shallots warm.

(Original recipe in BBC Olive Magazine, March 2011.)

Read Full Post »

Rillette & cornichon on scallion toastWe can’t resist those little plastic tubs of pork rillettes found in the fridge section of French supermarkets. Here’s what happened the end of the tub we brought home. No more rillettes until next year… unless we try making it ourselves of course.

Wine Suggestion: because we brought the rillette back from the Loire, a good Chenin Blanc was called for. The Chateau Hureau Samur Blanc “Argile” was rich and full while still being dry and textured enough to work with the fatty pork and sour pickle of the cornichons. Lighter dry wines might taste weak in comparison so make sure the wine you choose is good enough to stand up to the flavours of the dish. If you want to push the boat out a good, aged sweet chenin blanc, like a Bonnezeaux or Vouvray Moelleux with luscious botrytis would also be superb.

Pork Rillettes & Cornichons with Onion Sourdough – serves 2

  • 2-3 scallions
  • 4 slices of sourdough bread
  • pork rillettes
  • small handful of cornichons

Put 2-3 scallions in a food processor with 5 tablespoons of olive oil and some seasoning, then blitz to a paste. Soak the sourdough in this green oil.

Fry the bread in a non-stick pan until very crisp on both sides. Drain on kitchen paper, then spread 2 slices with the rillettes and add a few sliced cornichons. Top with the remaining slices of toast and drizzle with any remaining onion oil.

(Original recipe from Eat by Nigel Slater, Fourth Estate, 2013.)

Read Full Post »

Walnut Pesto

We first tasted walnut pesto in Florence a few years ago but it has taken us a while to get around to making it ourselves. This works equally well for a casual dinner or in smaller portions as a starter and it tastes really special. You can make this with fresh walnuts which you buy whole and shell yourself but it also works well with shelled walnuts, provided you make sure they are fresh (we buy our walnuts from Lidl which come in a sealed foil bag). You can keep the pesto in the fridge for up to a week and it freezes well too.

Wine Suggestion: we like to drink dry white wines that have texture and a certain crunchiness with walnuts, which aren’t always easy to match. Italian whites come to mind first and the nutty ones work very well, like Verdicchio, but it has been dry (sec) Jurançon that has proved a stellar match, like Cauhapé’s Chants des Vignes. A wine with a vibrancy of fruit, a fresh acidity like a crunchy green and red apple mix, some white flowers in the aromas and a texture on the palate that carries through with a long length and food friendly finish.

Pasta with creamy walnut pesto – serves 4 (with some pesto left over)

  • 400g orecchiette pasta
  • 175g walnut halves/pieces
  • 1 clove of garlic
  • handful fresh basil, roughly torn
  • 100g Parmesan, freshly grated, plus extra to serve
  • 50g butter
  • 4 tbsp extra virgin olive oil
  • 50ml double cream

Cook the pasta for the recommended time on the packet.

Meanwhile, put the walnuts and garlic in a food processor and whizz until finely chopped. Add the basil, cheese, butter and oil and pulse for a few more times, then season.

Pour the cream into a pan and warm through. Add two-thirds of the pesto, then gently heat to loosen it.

Take 2 tbsp of water out of the pasta pan before draining, then mix the pasta and the water into the sauce. Serve immediately with some extra Parmesan and a few basil leaves.

The leftover pesto will keep in the fridge for a week or the freezer for a month.

(Original recipe by Ursula Ferringo in BBC Good Food Magazine, April 2009.)


Read Full Post »

Potato salad

Nothing beats minty new potatoes. We like to make this in May when the Jersey Royals arrive and the promise of summer is just around the corner but of course it’s good all summer long.

Potato & mint salad – serves 4

  • 900g small new potatoes
  • 2 tbsp French dressing (see recipe below)
  • 6 tablespoons mayonnaise
  • 2 tbsp plain yoghurt
  • a large bunch of mint, chopped

Put the potatoes in a pan of salted water and bring to the boil. Simmer for about 15 minutes or until tender, then drain and put into a bowl with the French dressing and leave to cool.

Mix the mayonnaise, yoghurt and mint together and toss with the potatoes. Season really well with salt and pepper.

French Dressing: Blend 200ml red/white wine vinegar, 200ml extra virgin olive oil, 400ml sunflower oil, 1 garlic clove, peeled and finely chopped, 3 tbsp wholegrain mustard, and 1-2 tbsp honey and season with salt and pepper. This makes 800ml of dressing and will keep in the fridge for a few weeks.

(Original recipe from Avoca Salads by Hugo Arnold, Avoca Ltd., 2007.)

Read Full Post »

Easy laksa

Rice noodles often get forgotten in the back of our larder. Much better to use them up in a soup or laksa like this one which is substantial enough for a main course. This recipe is gluten-free – the only reason we’re telling you that is because from now on we are going to add a gluten-free tag to any recipes that are gluten-free. So very soon you will be able to search JonoandJules for gluten-free recipes.

Wine Suggestion: We quite often plump for a Riesling when eating aromatic Thai dishes but have found another gem that works superbly for this hot, spicy, creamy, coconut dish: Alsace Pinot Gris. Often overlooked the richer styles favoured in Alsace provide a counterpoint to the heat and bring spices and texture of its own to the mix. For this dish we had a Bott-Geyl Points Cardinale, which is a Pinot d’Alsace, that is a blend of Pinot Blanc, Pinot Gris, Pinot Auxerrois and Pinot Noir. We found it both elegant and rich with a fresh attractive fruit and a breadth of flavour to match the Laksa. We’re on the lookout for more Pinot Gris and dishes to try now after the success of this match.

Chicken Noodle Laksa – serves 4

  • 2 chicken breasts, sliced into strips
  • 100g medium rice noodles
  • 3 tbsp sunflower oil
  • 6 scallions, finely sliced
  • 2 x 400g tins coconut milk
  • 2 tsp Thai fish sauce
  • 1 lemon grass stalk, bashed
  • juice of ½ lime
  • coriander leaves, to serve

FOR THE PASTE:

  • 6 scallions, sliced
  • 1 red chilli, deseeded and chopped
  • 4cm piece of fresh ginger, peeled and grated
  • 3 tbsp peanut butter
  • 2 tsp lime juice
  • 1 tbsp light muscovado sugar

Make the paste by putting all the ingredients in the small bowl of a food processor or mini food processor and whizz until finely chopped (if you don’t have one of these you can grind them with a pestle and mortar).

Spoon 2 tbsp of the paste into a bowl. Add the chicken strips, season well with salt and pepper and stir until evenly coated with the paste.

Put the rice noodles into a shallow dish and pour over boiling water from the kettle to cover. Leave for 10-15 minutes or until softened. Drain and refresh under cold running water, then snip into short lengths with kitchen scissors and set aside.

Heat a large frying pan or wok over a high heat. Add 2 tbsp of sunflower oil and when hot, tip in the chicken and fry quickly for about 3 minutes or until nicely coloured and just cooked. Remove with a slotted spoon and set aside.

Heat the rest of the oil in the same pan, then add the scallions and the remaining paste and fry for a minute. Add the coconut milk, fish sauce and lemon grass. Bring to the boil, then simmer for about 5 minutes.

Add the chicken to the soup and simmer for another 3-4 minutes. Divide the noodles between 4 deep bowls. Remove the lemon grass stalk from the soup and add the lime juice. Ladle the soup over the noodles and sprinkle with coriander leaves to serve.

(Original recipe from Mary Berry’s Foolproof Cooking, BBC Books, 2016.)

Read Full Post »

Summer risotto

On a balmy summer evening we podded local broad beans and picked some french beans from the vines in our back yard. We used a stock made from a previously roasted chicken which was subsequently used to poach chicken fillets for a Coronation Chicken. The only thing out of place were the frozen peas, but we think unless you pick the pods fresh and eat them almost immediately, frozen is often best. This is based on a risotto primavera or Spring risotto which usually contains asparagus.

Wine Suggestion: a fresh, summery Godello caught our eye. The La Sonrisa de Tares from Bierzo had enough weight to balance the starchy creaminess and depth of the Parmesan while a lovely textural freshness and summery zing made the beans and peas sing with all their fresh flavours.

Summer Risotto – serves 4

  • 200g shelled broad beans (you will need about 800g of broad beans in their pods to get this quantity or you can use frozen broad beans, defrosted)
  • 2 large shallots, finely chopped
  • 4 scallions, trimmed and finely chopped
  • 1 small garlic clove, finely chopped
  • 250g green beans, trimmed and cut into short lengths
  • 1.5 litres home-made chicken stock (you might not need it all)
  • 1 tbsp olive oil
  • 80g butter
  • 350g Carnaroli or other risotto rice
  • 100ml dry white wine
  • 140g frozen peas
  • 100g Parmesan, finely grated

Start by double podding the broad beans so you are left with bright green beans. To do this just blanch them in boiling water for 2 minutes, then drain and squeeze to remove the papery skin. If you’re using frozen beans you might be able to remove the skins when defrosted without having to blanch first.

Put the stock into a large pot and bring to a simmer.

Heat the oil and 40g butter in a wide heavy pan with a lid. Cook the shallot, scallions & garlic for a few minutes until soft and transparent but don’t let them brown. Add the rice and keep stirring for a few minutes until the rice is hot and starting to sizzle, then pour in the wine. Continue to stir until the wine has evaporated.

Now start gradually adding the stock, a ladleful at a time. Only add another ladleful when the previous one has been absorbed by the rice. Continue stirring and adding the stock for 14 minutes, then add the broad beans and peas with some salt and black pepper. Meanwhile, cook the green beans in the simmering stock for 6 minutes or until soft, then add these to the rice too. Continue stirring and adding stock until the risotto has a creamy texture and the rice is soft but retains a little bite.

Remove the pan from the heat and add half the parmesan, the rest of the butter and one last splash of stock to retain the moisture. Put the lid on the pan and leave to rest for a few minutes off the heat. Serve with the rest of the Parmesan sprinkled over the top.

Read Full Post »

Feta, fresh & semi-dried tomato couscous

We cooked this dish while camping in France and it was a great side dish for all sorts of barbecued meat. It’s also a great idea for using up leftover sun-dried tomatoes which can easily get forgotten in the back of our fridge.

Tomato & Feta Couscous Salad – serves 4

  • 200g couscous
  • 250g piece of feta cheese
  • 2 tbsp olive oil
  • 2 tbsp balsamic vinegar
  • 300g cherry tomatoes
  • 50g sun-dried tomatoes
  • 3 heaped tbsp chopped basil leaves

Put the couscous into a large bowl, pour over boiling water to cover, then leave to soak for 20 minutes or until the water has been absorbed.

Marinate the feta in the balsamic vinegar and olive oil for about 20 minutes.

Chop the cherry tomatoes and sun-dried tomatoes and mix together.

Crumble the marinated feta into large pieces, then fork through the couscous with the tomatoes and basil and season to taste.

(Original recipe from Eat by Nigel Slater, Fourth Estate, 2013.)

Read Full Post »

Big pieces of fish are particularly well suited to the large cooking space you’ve got on the barbecue. We’ve invested in a fish basket for the barbecue but when we cooked this we didn’t have one and it was tricky to turn. If you don’t have a fish basket you might find it easier to cut the side of salmon in half.

We also really like this without the cucumber yoghurt and served with some champ (mashed potatoes with scallions and loads of butter for any of you non-Irish readers).

Wine suggestion: White and fresh, but also with a full body and a good texture. Out of fashion somewhat we tried a Chablis  … a 1er Cru Montmains from Domaine Bois d’Yver that we had lying around. It was a couple of years old but the extra age added extra layers of depth to a wine that was still fresh and dynamic. If you’d prefer a red then lightly chill a young Pinot Noir for 20-30 minutes and you’ll also have a treat.

Barbecued Side of Salmon with Cucumber Yoghurt – serves 4-6

  • 1.5kg side of salmon, scaled and pinboned (order this from your fishmonger)
  • zest and juice of 1 lemon
  • large bunch of basil/fennel tops, finely chopped
  • 1 cucumber, peeled lengthwise at intervals to make stripes
  • 300ml natural yoghurt
  • 1 red chilli, deseeded and finely chopped
  • small bunch of mint/oregano, leaves picked and chopped

Brush the bars of the barbecue clean or your fish will stick (the fish basket will help with this), then light it and get it nice and hot.

Put the salmon skin-side down on a board and slash the flesh side with a sharp knife, about 1cm deep. Scatter the lemon zest and most of the fennel tops/basil over the salmon, then push into the cuts that you made with your fingers. Rub the fish lightly all over with olive oil and season well with salt and pepper.

Put the salmon on the barbecue, skin-side down. Check it after about 4 minutes by which time the skin should have got nice and crispy. Turn the fish carefully and cook on the other side for 2-3 minutes. You can carefully take the skin off the salmon at this stage and place it back on the heat to get really crispy.

Cut the cucumber in half lengthways and remove the seeds. Chop the seedless cucumber and mix with the yoghurt. Add some lemon juice, half the chopped chilli, and half the mint/oregano. Drizzle over some good olive oil and season well.

Break the salmon into portions with a fork and serve with the cucumber yoghurt, sprinkled with the remaining chilli and herbs. Drizzle with a little more olive oil and serve with a piece of the crispy skin if you like.

(Original recipe from Jamie at Home by Jamie Oliver, Michael Joseph, 2007.)

Read Full Post »

Raspberry Jam

We make a batch of this every year and it really is the easiest of jams. If your pot is big enough and you find a good supply of raspberries we suggest scaling this up: this time we used 3kg raspberries but could easily stretch to 6kg in our pot if we had enough jars free.

Before you start you need to sterilise your jars. Heat oven to 140C/120C fan/gas 1. Wash the jars in hot, soapy water, then rinse well. Place the jars on a baking sheet and put them in the oven to dry completely. Alternatively run the jars through the hot cycle in the dishwasher.

Raspberry Jam

  • 1kg raspberries
  • 1kg jam sugar (the sort with pectin added)
  • juice of 1 lemon

Put a plate in the freezer to chill.

Put half the raspberries and the lemon juice into a preserving pan. Mash the berries with a potato masher over the heat, then leave to cook for 5 minutes. Tip the cooked berries into a sieve over a bowl. When the juice has drained into the bowl start pushing the pulp through the sieve with a wooden spoon until you are left with only seeds in the sieve. Discard the seeds.

Tip the contents of the bowl back into the preserving pan and stir in the sugar. Heat gently, then add the rest of the whole raspberries. Bring to the boil and boil rapidly for 5 mins. Take off the heat and drop a little jam onto the chilled plate. Push your finger through it – it should wrinkle and look like jam. If it doesn’t, boil for 2 mins before testing again.

Stir the jam well as it cools, then pour into your sterilised jars and seal. It will keep unopened for a year, although the colour will darken a little. Keep the jars in the fridge once opened.

(Original recipe from BBC Good Food)

Read Full Post »

Spaghetti al cartoccio

This starter portion of pasta is perfect for entertaining as it can be prepared up to 6 hours in advance and finished off in the oven when required. We had this as a second course after broad bean bruschetta and followed by barbecued balsamic beef and then home-made ice cream and summer berry compote for dessert.

Wine Suggestion: lovely with a slightly chilled red, and naturally, given the inspiration from the food we’d suggest Italian. A light, lively, youthful and fruity Sangiovese hits the spot in the form of a Rocca delle Macie Chianti Vernaiolo given 30-40 minutes in the fridge before serving; chilled but not ice cold. The fresh acidity works perfectly with the fresh tomatoes and olives and the combination speaks to us of summer.

Pasta al Cartoccio – serves 4

  • 2 tbsp olive oil
  • 1 large clove of garlic, peeled and left whole
  • 450g ripe fresh tomatoes, chopped
  • 1 red chilli, seeded and chopped
  • 280g dried spaghetti
  • 100g large black olives
  • a handful of flat-leaf parsley, chopped
  • grated Parmesan cheese, to serve

Cut 4 pieces of parchment paper, about 30x20cm.

Heat the oil in a saucepan over a medium heat, add the garlic and sauté for a couple of minutes. Remove the garlic, then add the tomatoes and chilli and season well. Simmer for 20 minutes, stirring now and then.

Meanwhile, preheat the oven to 200C/Gas 6/fan oven 180C.

Cook the spaghetti in salted water for half the time given on the pack, then drain well.

Add the olives and half the parsley to the tomato sauce and stir in the pasta. Taste and season to taste.

Divide the spaghetti between the pieces of paper, piling it into the middle of each. Scrunch the edges of each parcel  to seal tightly. Put the parcels in a roasting tin and bake for 7 minutes after which time the spaghetti should be al dente.

Remove the tin from the oven and transfer each parcel to a warm plate. Let everyone open their own parcels and sprinkle the spaghetti with the remaining parsley and some parmesan.

(Original recipe by Ursula Ferrigno in BBC Good Food, August 2001.)

Read Full Post »

Fennel & Roasted Tomato Lasagne 1

This is a great veggie dish that has had two outings in our house within a short space of time. It’s also one of the best recipes we’ve found for fennel which we sometimes find a bit uninspiring. We’ve made this in a larger tin, and thus thinner, and also in a deeper one. Both tasted great but we think the smaller diameter deeper dish works better.

Wine Suggestion: a classic match with Sangiovese especially from Chianti in Tuscany. Look out for wines with 100% Sangiovese in this case, even though there are some superb blends out there, as the nature of these wines complements the Fennel and Tomato more. We’ve tried both the Rocca delle Macie Sant’Alfonso Chianti Classico, which is unusally grown on thick clay, and the Selvapiana Chianti Rufina and both complemented the Lasagne excellently.

Fennel & Roast Tomato Lasagne – serves 4

  • 3 fennel bulbs, sliced
  • 3tbsp extra virgin olive oil
  • 800g tomatoes on the vine
  • 2tbsp balsamic vinegar
  • 150ml double cream, plus a bit extra if needed
  • 100g Parmesan, grated
  • 250g dried lasagne sheets

Heat the oven to 160C Fan. Place the fennel in a large roasting tray, season well and drizzle with 2tbsp of the oil. Place the tomatoes in a separate roasting tray. Season and drizzle with the remaining oil and balsamic. Roast both trays for 30mins

Stir the cream into the fennel and return to the oven for a further 10mins. Meanwhile lightly mash the tomatoes with a fork. Remove the fennel from the oven, grate over most of the cheese and stir to melt – it should make a little sauce that clings to the fennel – add a bit more cream if you need to. Reduce oven temp to 140c fan.

Spoon a thin layer of tomatoes into an ovenproof dish. Top with a layer of pasta, followed by a layer of fennel, then another layer of pasta. Repeat, finishing with a layer of fennel. Scatter over remaining cheese and bake for 45mins until golden and the pasta is cooked. Serve with a green salad.

(Original recipe by Matt Follas in BBC Good Food Magazine, July 2010.)

Fennel & Roasted Tomato Lasagne 2

Read Full Post »

Wood Pigeon salad with blackberries and hazelnuts

Thank you to our friend Niall for supplying us with fresh Wood Pigeon breasts and double thanks to him for all the plucking and butchery which were done by the time we arrived home! So on a glorious summer evening we put together this little salad. This would work well with other berries and nuts too; walnuts especially come to mind.

Wine Suggestion: This works great with Pinot Noir, in this case we raided our cellar for a bottle of 2009 Clerget Vosne Romanee “les Violettes” which was superb; all velvety spices, juicy dark fruits and excellent length. Both the salad and wine were a treat.

Wood Pigeon Salad with Blackberries & Hazelnuts – serves 2

  • 2 pigeon breasts, skin removed
  • 2 tbsp olive oil

For the dressing:

  • 3 tbsp olive oil
  • 2 tsp Dijon  mustard
  • 1 tbsp cider vinegar
  • 1 bunch chives, half snipped to short lengths and half finely chopped

For the salad:

  • handful of hazelnuts, roughly chopped
  • 2 large handfuls of mixed salad leaves
  • small handful of parsley leaves
  • 100g blackberries

Toss the pigeon in the olive oil and some black pepper, then set aside.

Mix the oil, mustard and vinegar with the finely chopped chives, a tiny splash of water and some seasoning.

Dry fry the hazelnuts, then set aside. Put the pan back on the heat and fry the pigeon breasts for 2-3 minutes on each side. Leave to rest in the pan for 5 minutes.

Toss the salad ingredients together with the sniped chives and a small amount of the dressing. Finely slice the pigeon breasts and arrange over the top. Drizzle some more dressing over the top and serve.

(Original recipe from BBC Good Food)

Read Full Post »

« Newer Posts - Older Posts »